Showing posts with label Layla. Show all posts

New Year's Sunrise Stamping Mani

Happy New Year! Last year was an incredible year for me as I got to connect with so many nail artists, opened Instagram account and gained 14K followers, and last but not least, have my own YouTube channel! It was such a busy year but fun. 

This year I'm thinking of slowing down just a little bit. I have a full time job (I'm not a nail tech, mind you), and most of my time outside work was dedicated to coming up with nail designs, creating them, filming the process as I create manis, writing up blog posts in 2 languages, and editing video tutorials. And oh yes, I do most of the housework too! It was like having two full time jobs. It's sometimes quite exhausting and I know I can't keep this pace up very long. I love seeing my Instagram account and YouTube channel grow, but that's not the purpose of my nail painting. 

So this is one of my new year resolutions - slow down to my comfortable pace. Hopefully this will also give me time to practice what I'm not good at, freehand, watermarble, etc. I looked back on my last year's new year resolutions on this post (although I only wrote this in Japanese) and it says:

1. Try not to buy too many polishes
2. Use all the untried
3. Do some frankening

At that time, I had 120 polishes but now.... about 240!! Haha! Well, I really need to slow down on this too. I have unbelievable number of untried also. *_* At least I got to franken quite a few polishes though!

Well, enough talk. Let's have a look at today's mani, shall we? I posted this mani on my Instagram on New Year's eve. In Japan, watching sunrise on New Year's Day is thought to bring good luck, so I created this mani for my friends and followers who may miss out on a real thing. 

I started off with white base, and applied PVA glue around my cuticles and placed masking tape on about 1/3 of each nail near the tip. I then did sponge gradient using pinkish red, orange and yellow, peeled off the glue and masking tape. I painted Sinful Colors Cinderella (light blue) near the tip and the base is done. Next, I made stamping decal using Torii gate image from Dashica Infinity 81 stamped with Mundo de Uñas Black, and placed it onto middle finger. I added birds from MoYou London Kitty 11 and painted the sunrise image in red and handpainted sun reflection in water using this detail brush from Born Pretty Store.

For pointer and ring finger, after the gradient, I painted A England Dancing With Nureyev near the tip and stamped trees and branches from MoYou London Suki 02 (ring finger) and Chez Delaney Asiatique 001 (pointer). I added some white dots on the trees and branches to represent snow. For pinkie, I added Kanji stamp from Chez Delaney Asiatique 001 plate, meaning 'happiness'.

This took me few hours to create but I'm so happy with the result. I have seen so many NYE manis featuring fireworks, but this is so different and I'm glad to share a piece of Japanese tradition in my mani. 

明けましておめでとうございます。昨年は私にとって大きな変化のあった年でした。たくさんのネイルアーティストさんたちと知り合うことができ、インスタグラムの開設に続いて自分のYouTubeチャンネルを持つまでになりました。年初には思いもよらなかったことです。忙しく、実りの多い1年でした。

新しい年を迎えて考えたのは、もう少し自分らしいペースで行こうかな、ということ。インスタを始めてから、毎日のようにネイルをアップされている皆さんのポストにつられて、自分のネイルチェンジのペースも少し早まった気がします。フルタイムの仕事と家事に加えて、ネイルデザインを考えて動画を撮って編集して、2か国語でブログも書いてインスタとYouTubeにアップ・・・という作業は思いのほか重労働で時間もかかります。他に自由になる時間はほとんど残りません。他のネイルアーティストさんたちのところにゆっくりお邪魔する時間もままなりません。インスタのフォロワーやYouTubeの登録者が増えていくのを見るのは楽しいですが、それが目的ではなかったはずです。

なので、今年は自分らしいペースで行こう、というのが新年の抱負の1つ。余った時間で苦手な手描きやウォーターマーブルの練習もしていきたいと思います。ちなみに昨年の新年の抱負がこの記事に書いてありますね。いわく、

一、新しいポリッシュの購入はほどほどに
二、未使用ポリッシュをゼロにしよう
三、自作に挑戦しよう

ふっ・・・・・。ちょうど1年前はポリッシュ所持数120本だった模様。この前数えたら240本あったよ・・・(フランケン、スタンピングポリッシュ、トップコート類除く)。それに伴い未使用ポリッシュも激増。自作(=フランケン)だけ唯一頑張った点ですかね。今年も引き続き、「せめてHelmer1つに収まる程度のポリッシュ数に留めよう」という抱負を掲げたいと思います。あとは先ほど言ったように苦手分野を頑張っていきたいと思います。

では今日のネイル。インスタに大晦日にアップしたネイルです。出来上がりはこちら。

Finished product, with Essence Better than Gelnails Top coat. Outdoor shot

白ベースでスタート。まずPVAグルーをキューティクル付近に塗っておき、爪先1/3程度をマスキングテープで隠しておく。三角スポンジにピンク寄りの赤、オレンジ、黄色の3色を塗り、爪にぽんぽんと数回乗せてグラデーション作成。グルーとマスキングテープを剥がして爪先にSinful Colors Cinderella(薄い青)を塗ったらベースは完成。次にDashica Infinity 81の鳥居柄をMundo de Uñas Blackでスタンプして中指に配置。その上にMoYou London Kitty 11から鳥をスタンプし、朝日を赤で塗りつぶして水面に朝日の反射を手描き。この時に使用したのは「春の歌」さんのこちらのブラシです。

人差し指と薬指はグラデーション後、A-England Dancing With Nureyevを爪先付近に斜めに塗り、その上にMoYou London Suki 02 (薬指)とChez Delaney Asiatique 001 (人差し指)から木や枝を追加。その上に雪を表す点をドット棒で追加。小指はChez Delaney Asiatique 001から「幸福」の文字をスタンプ。仕上げはNail of This WeekのChiroさんからいただいたEssence Better than Gelnailsトップコート。

使用ポリッシュはこちら。

Polish used

上段左から、

Layla Softtouch Effect 05 (for gradient)
Ciate hopscotch (for gradient)
Sally Hansen Mellow Yellow (for gradient)
Sinful Colors Cinderella
A-England Dancing With Nureyev

下段左から、

Mundo de Uñas Reddish (for sunrise & reflection in water)
Sally Hansen White On
Mundo de Uñas Black

This is A-England Dancing With Nureyev. Used for the rocks and ground.
Look how sparkly it looks in the sun!

テーマは言わずもがなですが「初日の出」です。日本では初日の出を見るとご利益があるといわれていることをインスタに書いて、「実際の初日の出が見られないかもしれない人のために作ったよ!」と一言添えてアップしました。すると「そんないわれがあるなんて知らなかった、日本の伝統を教えてくれてありがとう」とか「実際の初日の出が見られなかったらこのネイル見させてもらうね!」などなど、反応をいただけてこちらまで嬉しくなりました。漢字スタンプもベタではありますが、これを見た皆さんに幸福が訪れますように、の意味を込めました。

Can you imagine yourself watching sunrise coming up behind Torii gate on a frosty day,
where all you can hear is birds fluttering in the distance?

ちなみにこのキラキラしている青いポリッシュはA-England Dancing With Nureyev。これとSinful Cinderellaの組み合わせってどこかで見ませんでしたっけ?w またチョイ役で使ってしまったよ(゚∀゚;)

というわけで新年第1弾の初日の出ネイルでした。ニューイヤーネイルって海外では花火が定番なんですが、そもそも花火って日本人の感覚では夏の風物詩ですよね。シドニーの大晦日花火のネイルもやりたかったのですが、今回は「和」で攻めてみました。出来上がりに満足です。


にほんブログ村 美容ブログ 自爪ネイルへ

31DC2014 - Metallics: Smoosh Attack Metallic Mani

One of my stamping buddies over at Instagram, Elle @with2l is having a giveaway celebrating her 2.5K followers and I created this look inspired by her work.

Elle's works have a very unique effect, and she revealed her secret by this video. She uses two stampers, dabbs nail polish colours onto one, smooshes with another to create thin layers and place it onto nails. She calls this technique 'Smoosh Attack' and I recreated this look using metallics to be an entry for 31DC2014 Day 8 'Metallics'.

I started off with either Layla Mirror Metallics Metal Chromes or Black as Ebony, and using two stampers & a bunch of metallic polishes I have, I added thin layers of different colours onto my nails. I added some triangle studs from a rhinestone wheel Harunouta sent me, and finished off with inm Out the Door Top Coat.

I didn't know where to stop because you can build up as many layers as you want with this technique. I feel like I have a piece of contemporary art on my nails! Probably next time I will try with the same colour family to achieve more depth like many of Elle's works.

以前にMani SwapしたElle @with2lがインスタ上で2500フォロワーを達成した記念にGiveawayを開催中です。Elleとは非常に懇意にさせていただいているので、私も参加してみることにしました。参加方法の1つがElleの作品を再現(またはインスパイヤされたネイルを作成)とのことだったので、今回インスパイヤネイルを作ってみました。出来上がりはこちら。

Finished product - my first Smoosh Attack mani!

Elleの作品と言えば、幾層にも色が重なった複雑なエフェクトが特徴。みんなして「どうやってやるの??」と興味津々だったのですが、最近彼女が動画を公開しました。超目からうろこ!

すなわち、スタンパーを2つ使って片方に色を塗り、もう片方でつぶして薄いレイヤー状にして爪に乗せるということです。彼女はこれをSmoosh Attackテクニックと名付けています(゚∀゚) つぶして薄くするのでいくらでもレイヤーを重ねることができます。直接ブラシから塗る場合との違いはそこ。

使用ポリッシュはこちら。

Polish used (names written below)

左から

Impala Festa!
AT 濃密 06
Layla Metal Chrome
Layla Black as Ebony
Layla Titanium Sky
KleanColor Metallic Purple
KleanColor Metallic Orange
KleanColor Metallic Green

With this technique, you can layer quite a bit without getting too thick on your nails

ベースはLaylaのBlack as EbonyとMetal Chromeを使用。その上にSmoosh Attackで色を重ねていきました。ちょっと抽象画っぽい仕上がりに(゚∀゚) ちなみにメタリックのみを使ったので、今日の31DC2014のお題「Metallic」にもエントリー。

You can buy triangle studs here. My 10% off code is CPM10

三角スタッズは「春の歌」のこちらの商品から。会計時に割引コード「CPM10」を入力すると10%オフになります。Born Pretty Storeで買う場合も同じコードが使えます。

そんなわけで初のSmoosh Attackネイルでした\(^o^)/ 今度は似た色系統を使ってもう少し深みのあるエフェクトになるよう頑張ります(゚∀゚)


にほんブログ村 美容ブログ 自爪ネイルへ

Black x Green Retro Stamping Mani

Hi lovely readers! You probably realize by now how much I love MoYou London plates, but I actually have plates from other brands as well, lol. My most recent addition to my stamping plates inventory is Pueen Love Elements. Although the full image on this set is a bit tiny for my long nails, I like the fact that it has both small individual images and full images. For today's mani, I used one of the full size images.

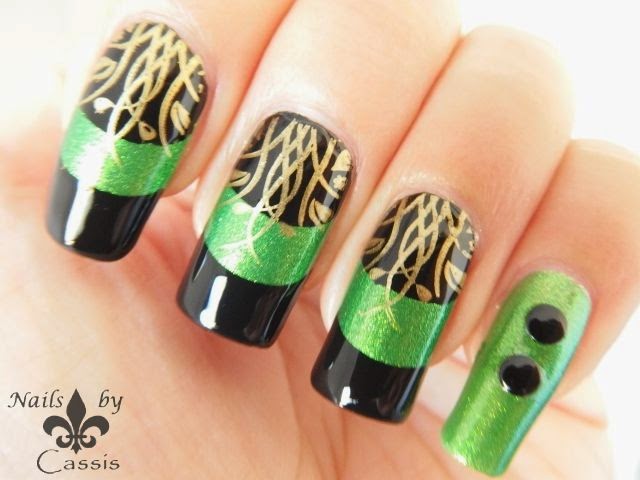
I started off with Layla Ceramic Effect 61, beautiful green polish with gold shimmer, and used french guides to cover the centre part of each nail to paint black on it. I then stamped a leafy design from Pueen 46 plate using Mundo de Uñas Gold. Kind of hard to explain, so I included a short Instagram video tutorial at the end of the post ;)

This is such an easy stamping mani but I'm totally in love with the result. I love the green and black contrast, and gold stamp is a nice addition. I've been wanting to do nail arts using striping tapes and french guides more, and I think I did quite well combining that with stamping :) Hope my readers love this mani as much as I do!

さて今日のネイルもスタンピングなわけですが、今回はMoYouではなくPueenを使ってみました。使ったのはPueen Love Elementsのプレート46。このセットはフルデザインと小さいデザインが混在していて、面白いデザインを作れる可能性を秘めたセットだと個人的に思います。まず出来上がりはこちら。

Finished product with Seche Vite

ベースはLayla Ceramic Effect 61。フレンチガイドを使って爪の中央部分を覆い、上端と下端を黒で塗り重ね。その上にPueen 46の柄をMundo de Uñas Goldでスタンプ。Seche Vite仕上げ。使用したポリッシュはこちら。

Polish used

左から

one coat black franken
Layla Ceramic Effect 61
Mundo de Uñas Gold

I totally love this green Layla, and it makes a great colour combo with black and gold

まずね、このLaylaの色が好きです。金のシマーが入っていて華やか。そしてフレンチガイドを使って黒を載せたこの組み合わせも好き。さらにこのPueenのデザインも好きだし、金の色合わせも好き。このネイル、本当に久々に会心の出来と言える大好きが詰まったネイルです(゚∀゚)

Somehow this mani has a retro feel to it and I love it!
Such an easy stamping using only three polishes

黒と金ってほんっとにどんな色でも合いますね。どことなくレトロな雰囲気を醸し出すこの緑x黒x金の組み合わせが好きです。手持ちポリッシュで緑と言ったらティール系が多くて、こういう黄緑系をあまり持っていないこともあって今回のネイルは本当に新鮮でした。フレンチガイドやラインテープを使ったこういう系統のネイル、またやりたい!

最後に、気が向いたのでインスタ向けのチュートリアルを作ってみましたので、興味がある方はどうぞ♪( ´▽`)


にほんブログ村 美容ブログ 自爪ネイルへ

Leadlight technique with MoYou London Pro 06 XL

I'm pretty sure my fellow stampers have heard about leadlight technique. This technique was named by Julia at Messy Mansion and she has an awesome video to show you how. I've only tried this technique once before for one of my entries for MoYou London nail art challenge (Day 28 - Butterflies). I wanted to write a proper blog post about this, because I know that this is pretty new for my Japanese readers.

I started off with white base and stamped with Konad Black using a floral pattern from MoYou London Pro 06 XL. Then I summoned all the jelly polishes I have in my stash, and mixed a bit with clear glitter polish to give some sparkles. I used dotting tools just as Julia did on her video, to colour the petals and leaves.

In my opinion, this takes more patience than the good ole' decal method. I really need more practice! I will be getting some alcohol inks to make some homemade jelly polishes. I know some girls have quite a success using Adirondack or Copic alcohol inks, so this will be my next project :)

新しいことに取り組んでいこうという意欲があるうちにいろいろやっておきます。今回はLeadlightテクニックというスタンピングテクニックのご紹介。実は一度MoYouのコンテスト中にやったことがあります(Day 28 - チョウチョ)が、きちんとした記事にしておきたいと思いまして。

LeadlightテクニックはMessy MansionのオーナーJuliaさんが名付けたテクニックで、やり方を説明した動画も用意されています。Leadlightはオージー特有の用語なのかな?ステンドグラスみたいな意味です。詳細は動画を見ていただくとして簡単に説明すると、白ベースの上に黒など濃い色のスタンピングポリッシュを使用してスタンプ。その上にシアーなジェリーポリッシュで色を付けていくというもの。

今までのdecal方式は色付けしたdecalを爪にかぶせる方法でしたが、このLeadlightは爪に柄をスタンプした後に色を付けるのが違い。では出来上がりはこちら。

Finished product - Flowers are from MoYou London Pro 06 XL

使用したプレートはMoYou London Pro 06 XL。白ベースの上にKonad黒でスタンプ後、ジェリーで色付けしています。使用したポリッシュはこちら。

Polishe used. The second from the right is a clear glitter polish I used to mix with jellies

左から

Nfu-Oh JS33 - green jelly
Revlon Royal - blue jelly
OPI I'm never ambarrased - orange sheer tint
Ciate Boudoir - red jelly
essence Space queen - clear glitter
Layla Soft Touch 05

Closeup - can you see a bit of a sparkle?

マクロショット。ちらちらとキラキラグリッターが見えるのが分かるでしょうか。

I simply mixed jelly with clear glitter on a palette

このテクニックではジェリーポリッシュが必要です。クリームなんかを使うと黒のスタンプ線が見えなくなってしまうので。Helmerをがさごそしてかき集めたジェリーポリッシュをパレット上で透明グリッターポリッシュ(essence)で混ぜて使いました。

This pretty Layla is what I bought in Adelaide. 2 for AUD 10. WooHoo!

ちなみに他の指に使ったこのLaylaはカンガルー島に旅行した時にアデレードで買ってきたもの。まだ2本で10ドルセールやってましたよ(゚∀゚) 今回はこれも含めて6本購入。ピンクをあまり塗らないカシスですが、これはジューシーなベリーピンクでとても気に入りました。

Definitely needs more practice!

このテクニックを使う場合の柄ですが、今回使った柄みたいに塗りつぶされた箇所が少ないものを使うのが吉です。decalと違って色付けした部分が表面に来るので、透明感のある仕上がりになるのがこのテクニックの特徴。

このテクニック、スタンピング愛好家たちの間で今大人気で、自分でジェリーポリッシュを作るのが大いに流行っています。私が今注目しているのがコピックバリオスインクを使ったもの。このアイデアの出所は「スキホウダイ」のシイキさんです。特にこちらの記事、目から鱗です(゚∀゚) それから、「爪爪爪 -THE趣味NAIL-」のこっぴさんもコピックを使ったカラートップコートを作成して素敵なネイルを披露されています。「スタンプ線が見える透明度を確保しつつしっかりとした発色」となるとこのコピックが一番良さそうです。しかし高いんだコピック、、、こっちで買うとorz。同じアルコールインクのAdirondackでしばらく代用する方向で考えています。

というわけでLeadlightテクニックのご紹介でした♪ まだまだ練習が必要な感じですが、また気が向いたらやってみます(`・ω・´)キリッ

にほんブログ村 美容ブログ 自爪ネイルへ

Layla Hologram Effect - Emerald Divine stamped with MM06

Temperature has dropped down from over 40 degrees to around 20 degrees in my town and I feel the autumn is coming. I still have quite a few untried holographic polishes, so I will try as many of them as I could before it gets too cold and less sunshine.

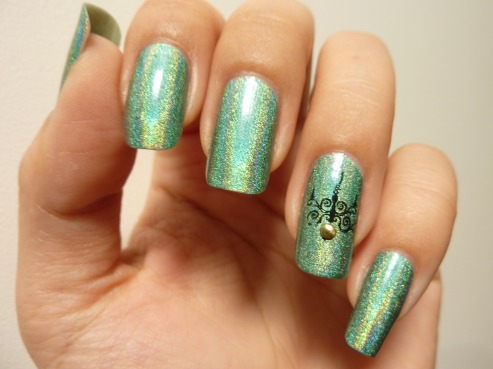
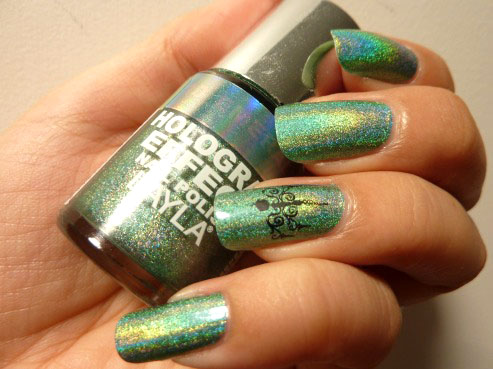
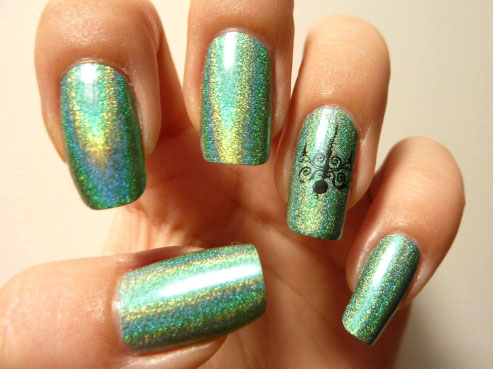
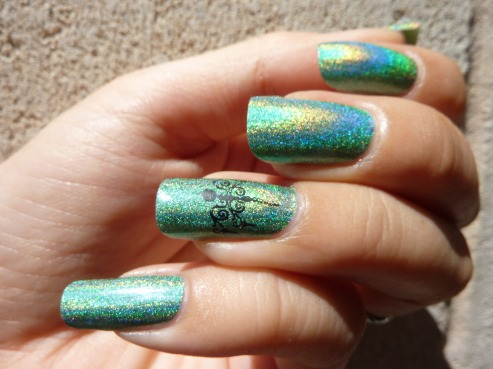
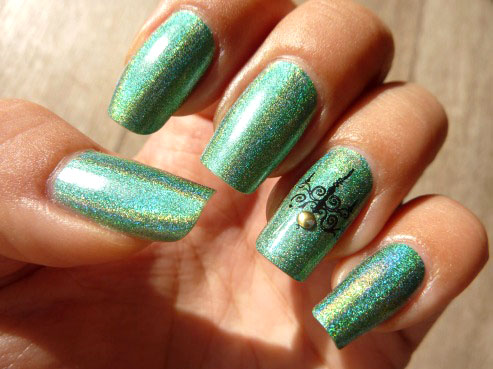
As I bought Nfu Oh Aqua Base, I don't hesitate to try Layla and Perfect holographics any more. Here I'm showing you Layla Hologram Effect, Emerald Divine stamped with Messy Mansion MM06 just on my accent nail. Aqua Base sure does make this Layla holo easy to apply! I love the intense in-your-face type of holo on this polish.

前回も書きましたが、気温が40度から20度台にぐっと下がり、日照時間もやや短くなってきました。そんなわけでしばらくは未使用ホロをふんだんに使っていこうかと思います。

Crush CosmeticsでNfu Oh Aqua Baseを買ったので、もうどんなホロもドンと来い!という感じでようやく爪に塗ることができました、Layla Hologram。スティックに塗った感じから塗りにくいタイプのホロだな、と気付いてしばらく敬遠していました。

今回塗ったのはEmerald Divine。上品な緑のLinearホロです。大好物(゚∀゚) 爪に塗ったのがこちら。

P1030645.jpg

Aqua Baseの上に2度塗り、薬指以外はトップコートなし。室内の陽の当たる場所にて。

P1030632.jpg

薬指はMessy Mansion MM06からシャンデリア柄をスタンピング。今回はポリッシュが主役なのでスタンピングは控えめにしました。

P1030638.jpg

シャンデリア柄にスタッズを付けた写真と付けてない写真がごちゃまぜになってますがお気になさらず(汗)。スタッズ1個はちょっと寂しいのでなくてもよかったかな。

P1030634.jpg

まぁそんなことよりこのホロを見てください(゚∀゚) こちらは屋外撮り↑。黄色い筋が見えてます。手持ちのホロの中でもかなり強烈な部類です。

P1030643.jpg

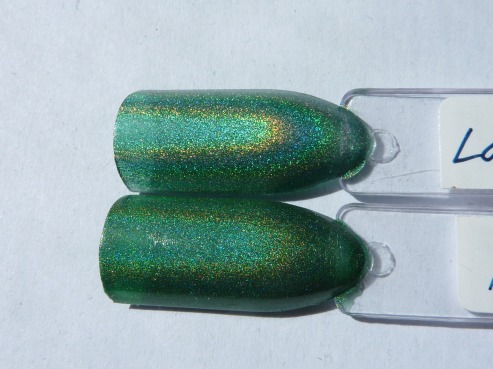
緑ホロといえばNubar Reclaim。ちょっと写真がイマイチですが、一応比較画像。上がLayla Emerald Divine、下がNubar Reclaim。Nubarの方がやや緑が濃いですが、ホロの強さはLaylaの比ではありません。

P1030651.jpg

ちなみにベースに塗ったAqua Baseなのですが、評判どおりこれのおかげでホロがかなり塗りやすくなりました。本当に買ってよかった\(^o^)/ Perfect Holographicsもこれで心置きなく塗ることができます。

しかしこのAqua Base、蓋を開けたとたん何やらアルコールの匂いが(゚∀゚;) これはこれでいいんでしょうか・・。カシスは下戸なので酔っ払いそうになりましたw

それにしても緑ポリッシュはテンション上がるな~。A-Englandの緑ホロ2本もまだ未使用なので塗るのが楽しみです(o^∇^o)ノ


Layla Mirror Effect - Metal Chrome

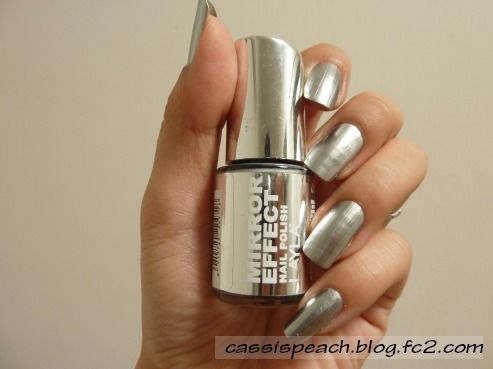
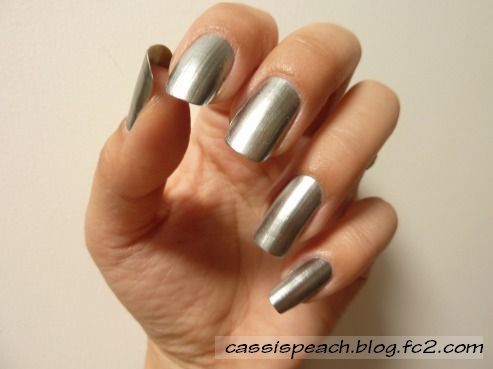
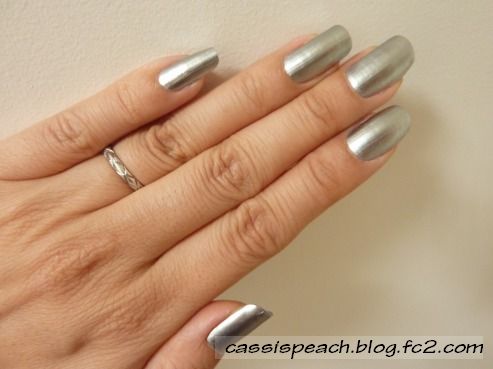
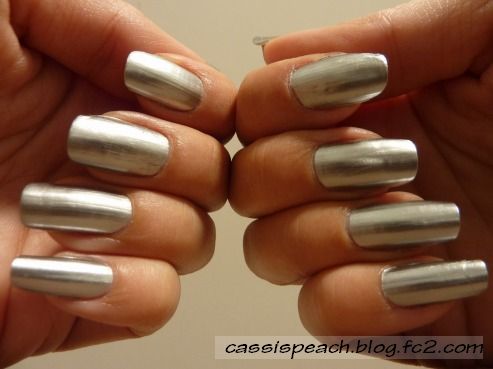
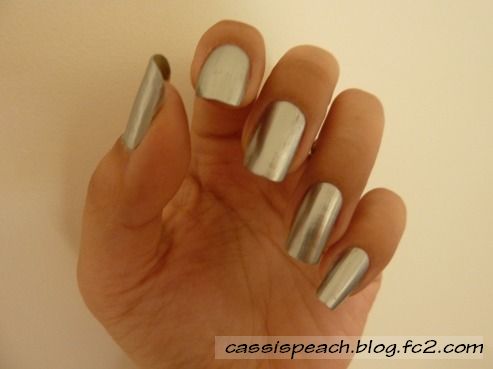
I have never imagined I would find these in Australia - Layla nail polishes! During my trip to Adelaide I found those beauties in one of the cosmetic shops in CBD. Selling 2 for only AU$10!!! OMG, I should have got more :D Here I'm showing you the mirror effect 'Metal Chrome'. Wear time is only 1 day as I have heard, but the effect is stunning. So IN LOVE!

アデレード旅行中、ふらりと入ったコスメショップで衝撃の出会いがありました。一瞬目を疑いました。まさかまさか・・オーストラリアの店頭で巡り合うとは夢にも思わなかったポリッシュ。それが

Layla Nail Polish

Laylaはイタリアのブランドです。ミラーエフェクト、ホログラムエフェクト、セラミックエフェクトなど、通常のクリームとかシマーとかとは違う「エフェクト系」を売りにしています。

このLaylaのミラーエフェクトのSwatchをかなり前に見て一目ぼれしたんですが、Ninja Polishなどでのお値段$15.50・・。憧れつつも、きっと手にすることはないだろうと思っていました。

そんなLaylaが目の前に。しかもセールで2個10ドル!!「新しいポリッシュの購入はほどほどに」という新年の誓いを思い出すも、迷ったのは「2個買うか4個買うか」という点のみw だって、この値段じゃ買わないわけにはいかないでしょ?

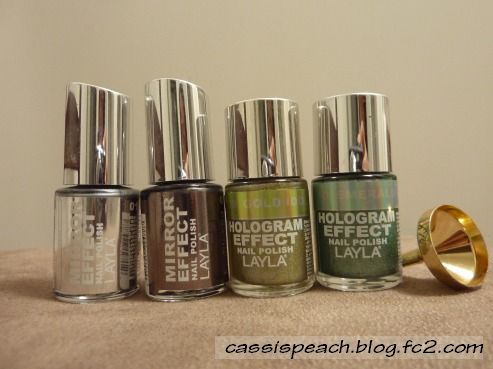
結果的に4つ買いました。それがこちら。

P1030077.jpg

左から

Layla Mirror Effect - Metal Chrome
Layla Mirror Effect - Black as Ebony
Layla Hologram Effect - Gold Idol
Layla Hologram Effect - Emerald Divine


ミラーエフェクト2本とホロ2本!\(^o^)/ それから、一番右のは自作に使えるかな?と思って買った小さなfunnel。Laylaのホロの話はまた別の機会に譲るとして、ミラーエフェクトについて少しお話を。

これまでSwatchやレビューを食い入るように読んでいたので、Laylaのミラーエフェクトについて事前知識が少しありました。つまり、

一、ベースコートとトップコートは塗らないこと
二、爪のでこぼこが如実に表れるので、気になるようなら爪にバッファーをかけておくこと
三、持ちは1日のみ


これを踏まえてwktkしながら塗りました。

P1030078.jpg

塗ったのはMetal Chrome。これで2度塗り。ベースもトップもなし。ベースコートはAqua Baseがあればそれを使っても可、というのは読んだことがありますが、私は持ってないので使いませんでした。トップコートはミラーフィニッシュを損ねるので使わない方がよいそうですが、小指に試しに塗った感じではさほど変わらなかったかな?

P1030079.jpg

爪のでこぼこがはっきり出ないよう、少しだけバッファーをかけました。爪を弱めるといけないので本当に少しだけ。なので、多少縦の線が見えますね。

P1030083.jpg

でもでも・・この均一な光りよう・・・(惚れ惚れ)。まるで水銀を塗っているような感覚。しかも、乾きがものすごく早い。小指から塗ったとして、中指を塗り始める頃にはもう小指は乾いているぐらいの速乾。

P1030084.jpg

ミラーエフェクトの名の通り、つるつるの爪の上に塗ったら自分の顔が映っちゃうんじゃない、コレ!?

P1030087.jpg

日陰で撮ったらもっと凄かった。縦の筋が消えた!! Minxに一番近いポリッシュだと思う。

P1030086.jpg

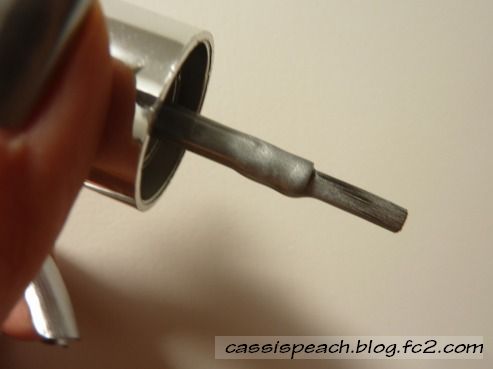
もう1つ特筆すべきこと。この刷毛が史上最高に塗りやすい。先端まで幅が均一で、太すぎず細すぎず。ポリッシュの含み具合も多すぎず少なすぎず、コントロールしやすい。爪のきわまで綺麗に塗れてキューティクルに流れることがない。嗚呼・・全世界のポリッシュブランドよ、、、、すべてこの刷毛に統一してたもれ~!

買って大満足でした。というより、なんで全種類買わなかったんだろう?と後悔しました。またアデレードに戻りたい(;▽;)

そんなLayla Mirror Effectですが、1つ大きな欠点があります。ミラーフィニッシュ全般に言えるようですが、持ちが非常に悪い。「1日しか持たなかった」という怒りのレビューを多く目にしました。ベースもトップも塗らないもんだから、仕方ないかな。最近出たOPIのPush and Shoveも「持ちは1日のみ」という但し書きがあるそうです。

私は1日だけ、と割り切って使ったのでまったく気にならず、塗っている間ルンルンでした。確かにシャワー後には爪の先が剥がれてきましたね。次回トップコート使ってどうなるか見てみようと思います。

P1030088.jpg

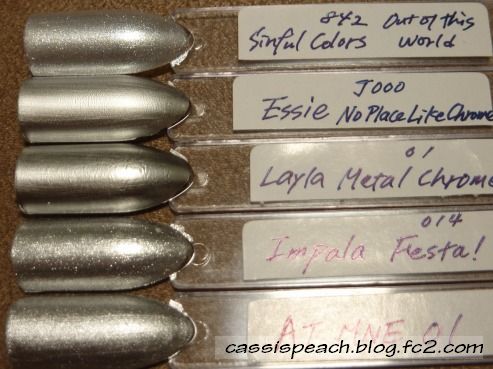
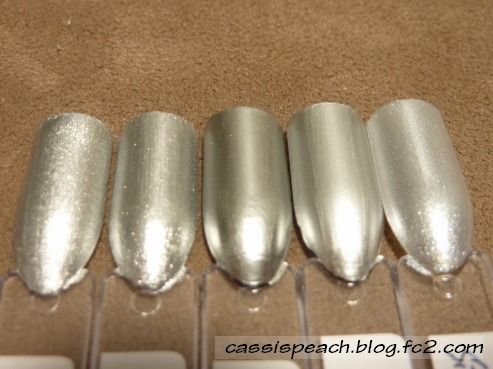
ちなみにシルバーのポリッシュ、こんなに持ってました。上からSinful Colors、Essie、Layla、Impala、AT濃密です。EssieはLaylaと同じくミラーエフェクト系ですが、Laylaほどミラーな感じはありません。

P1030089.jpg

右から2つ目がEssie、真ん中がLayla。こう見るとLaylaのミラーフィニッシュぶりがよく分かります。

P1030090.jpg

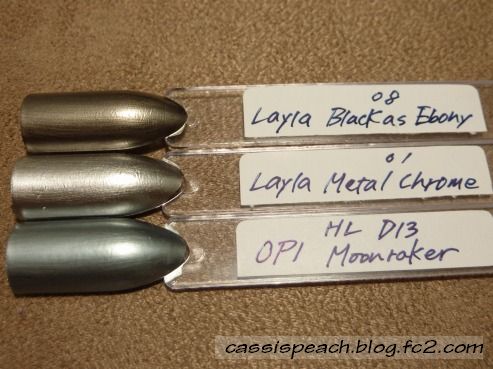
こちらはもう1本のMirror Effect、Black as Ebonyとの比較。こっちもカッコイイ!!一番下のはなんとなく似てる系だと思って並べたOPI Moonraker。

そんなわけで、あまり日本の皆さんの需要はないかと思われますが、個人的に大ヒットだったので紹介させていただきました。知らない土地に行くとこういう出会いがあるからいいですね~♪